
And now I'll tell you how to make one yourself!
First things first you will need a few supplies:
- A shirt that fits you nicely at the top (but you'll cut off the bottom, so stains, tears or other issues won't be a problem)
- Matching fabric of your choice (1.5x your waist size)
- 2" wide stretch elastic (2" wider than your waist size)
- A sewing machine (doesn't need to be fancy)
- Iron & ironing board
- scissors & straight pins
- Thread (same color as your elastic)

I happened to have some leopard print fabric that weirdly enough used to be a sheet! It was new, don't worry, but didn't fit any beds in my house. So I found a cute top from the thrift store and I had to actually buy the elastic from the fabric store.
Your fabric should be 1 1/2 times the width of your waist. Length is up to you. I like shorter dresses that fall below my knees so that is the length I picked for my fabric. You can wait to pick the length at the end if you want, but if you choose to hem it before hand make sure to leave yourself an inch on either end of the fabric for the hem. I like clean hems with no loose ends so once the fabric was cut I folded & hemmed both sides and the bottom. You don't have to hem the sides, but I like it better that way.

Next you want to fold over the top about 3/4 of an inch, stitch & then iron flat. Next sew a long running stitch above your hem stitch from one end to the other with no back-stitching. Pull top thread to begin gathering the fabric. You want to gather the fabric until it is your waist size plus about 2 inches.


At this point I matched up the two sides (with fabric inside out) and sewed up the back seam, then ironed the seam open. You can do this step before the gathering stitch but this way works better for me.

Okay so next up is the elastic band! This step is super easy! Wrap it in a circle overlapping 1inch of fabric and sew two zigzag stitches up to hold it.

Then pin the skirt to the elastic (you can do this right side out or inside out, whichever is easier for you) and sew with a zigzag stitch.


You can stop there and use it as a skirt over any top you want!
Or you can go ahead and make it into a dress.
Put your shirt on and pull the skirt on over your head. Mark where you want the top of the belt to be on your shirt. Once you take the shirt back off, measure how far that is from the bottom of the shirt. Cut off the shirt all the way around 2 inches below where you want the belt to be.

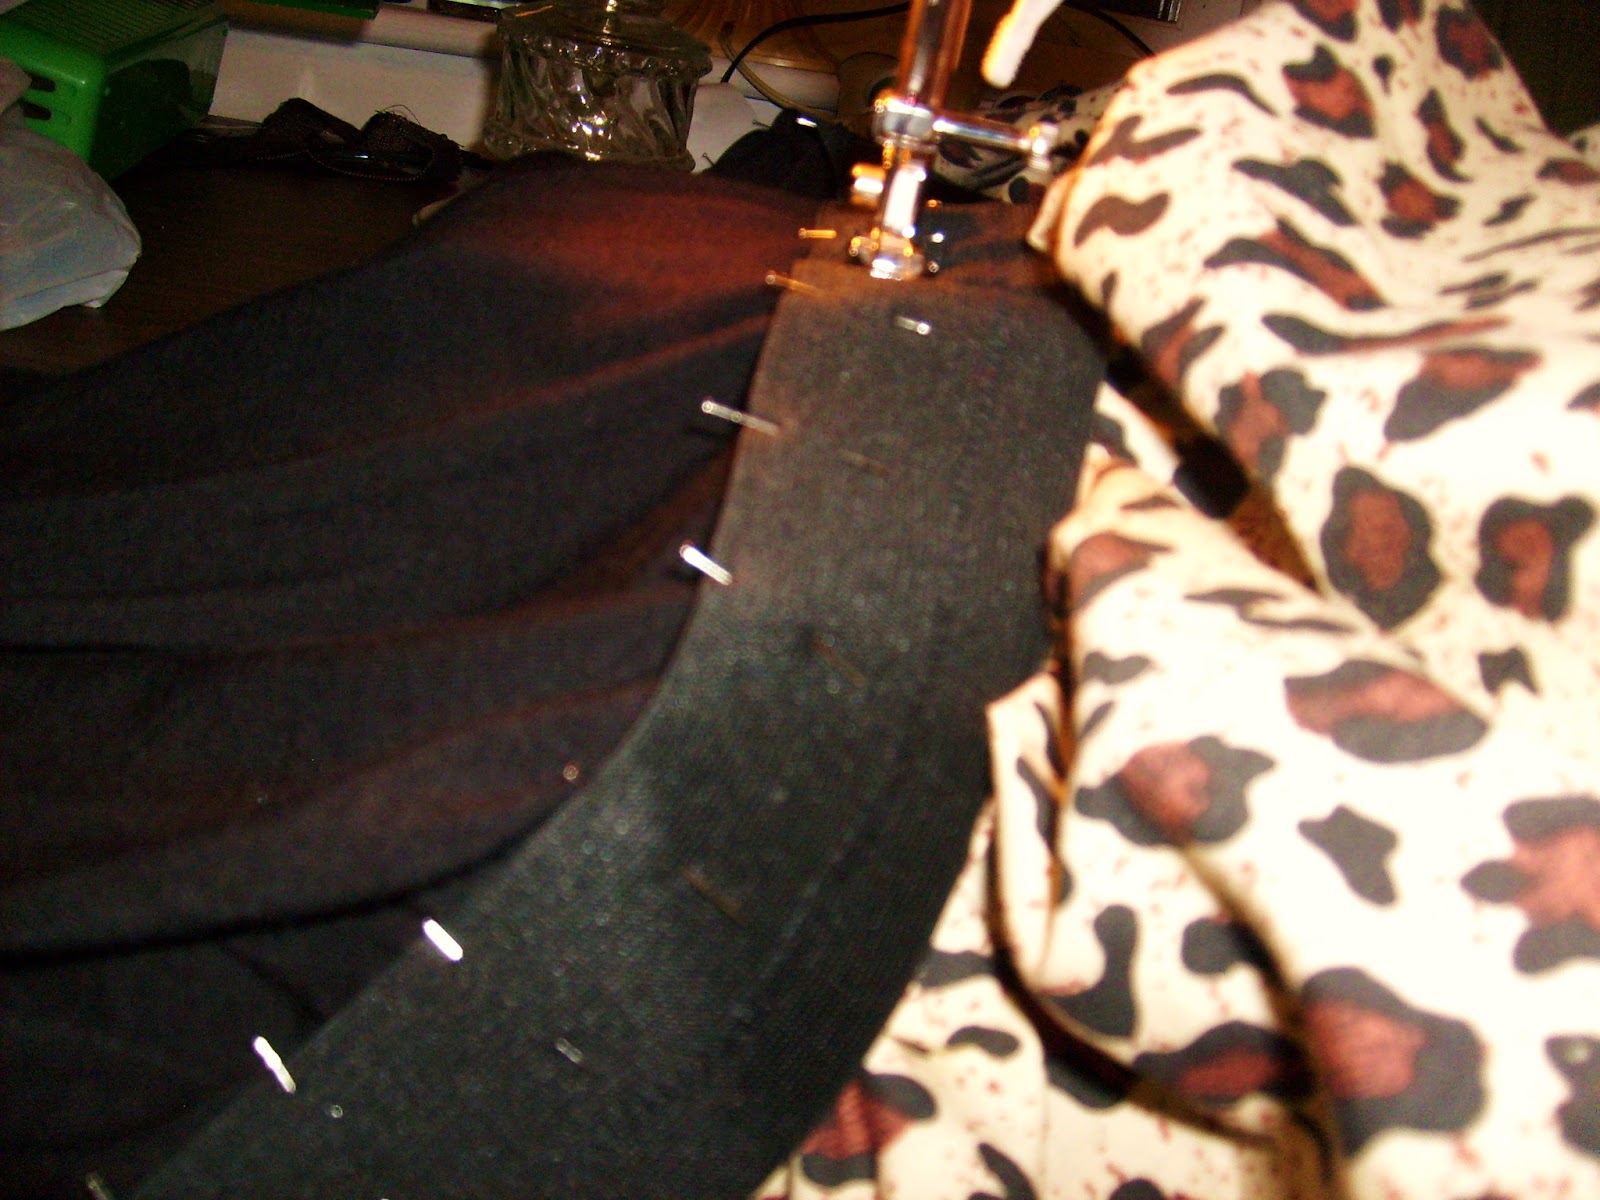
The white mark is where I want the top of my elastic to be. I gave it more than 2 inches just to be safe. Next pin the shirt into the skirt and sew with a zigzag stitch. I did this right side out so I could see what I was doing, but it might be easier to do inside out.
Take all the pins out and try on your new creation!

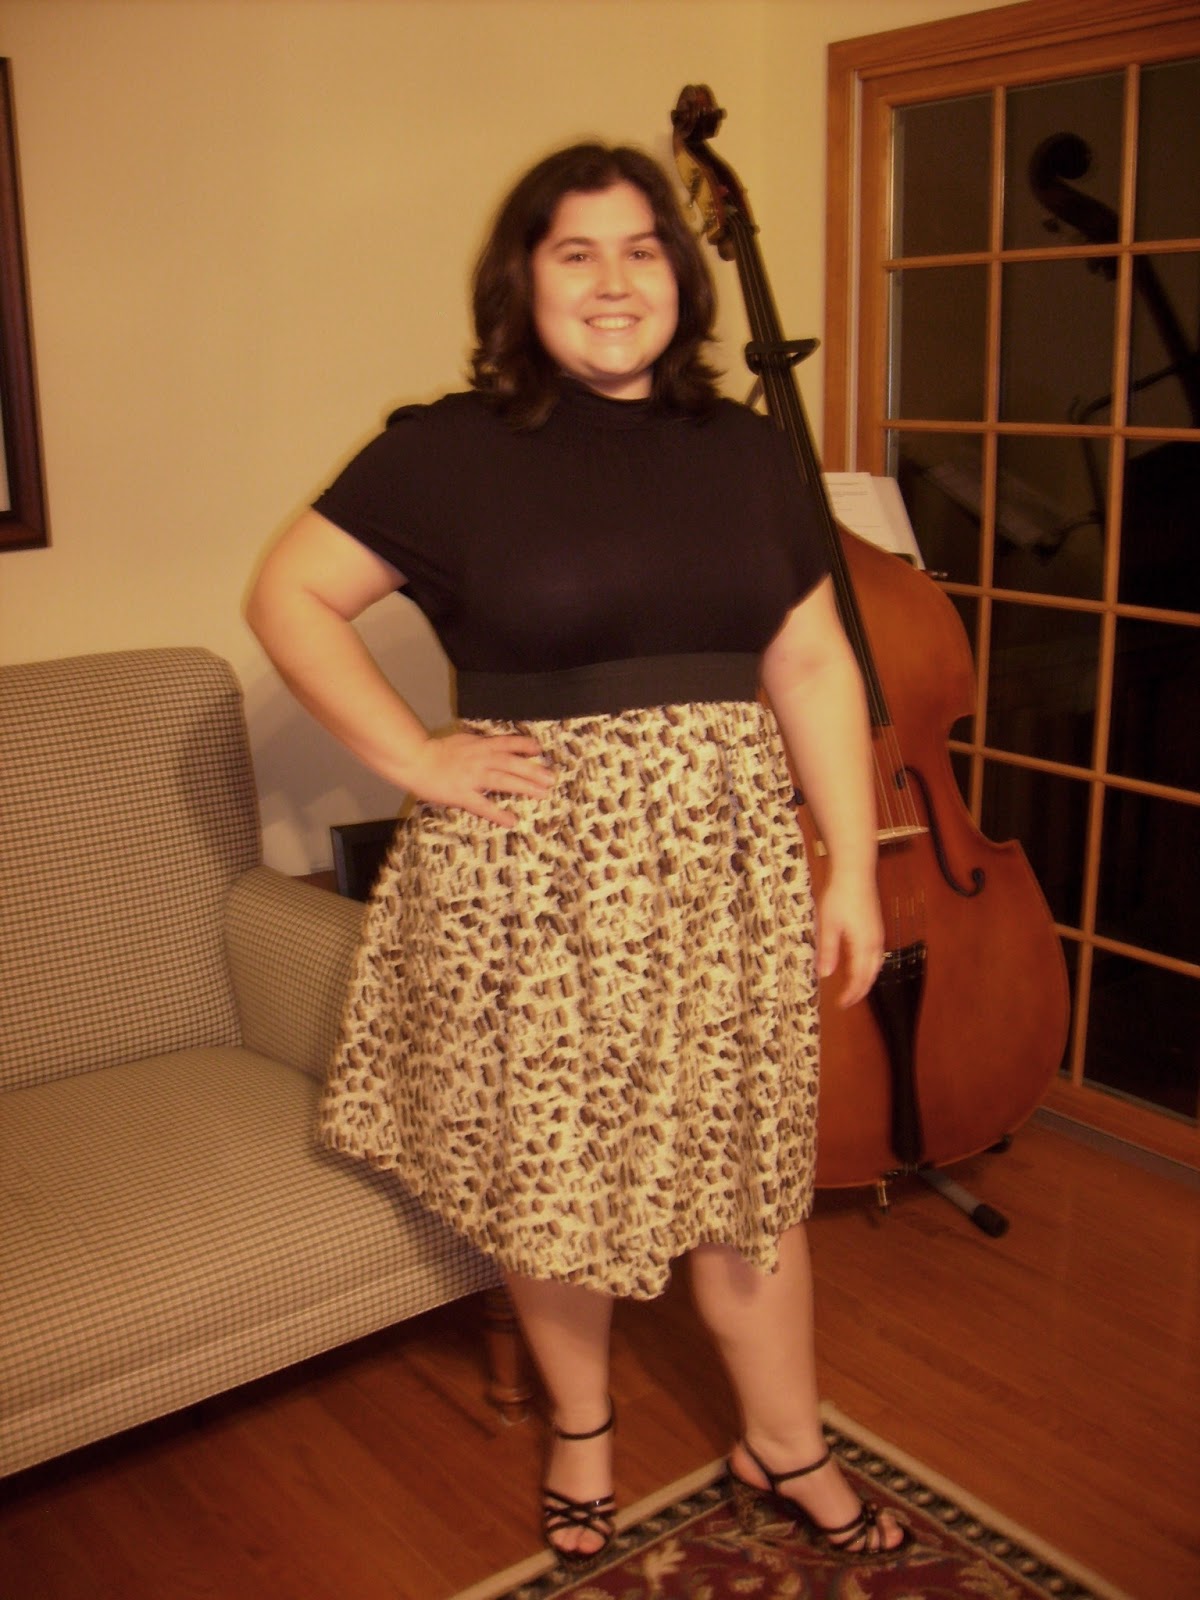
TA DA!
I plan on making a few more of these and I will be sure to post them for you to see!
Great job and just your style and color! Love to see what jewelry you use to accessorize.
ReplyDeleteLove this idea & your great instructions with lots of tips. Now I need to get my sewing machine fixed. ~Amy
ReplyDelete