Here is what you will need:
- Wooden frame (as large as you want it)
- flat cork (you can find it in a 4 pack at various stores)
- Fabric of your choice (try to make sure it isn't the kind that pulls easily)
- Posterboard
- Staplegun & staples
- Scissors
- String/twine or a picture hanger
First you will need to take all the stuff out of your frame. Take the backing off, glass and all the paper out. If it is an art piece instead of a picture frame you will need to take all the staples out as well:
Next you need to measure your cork to fit your frame. We had a large frame and the 10 inch squares of cork weren't big enough. So we measured how much more we would need and cut a strip to fit.
As you can tell the cork didn't fit to the bottom either so we did the same thing there. Once we had all 4 pieces together we cut out doubles of everything to make our cork board twice as thick. Here is what ours looked like so far:
Now that we know everything fits take the cork out of the frame for now. Measure and cut out a piece of posterboard the same size as your total cork area (the same as the inside measurement of the frame). Then place the cork on the posterboard one layer first. Take your doubles and make your second layer so that none of the cracks line up. Example: If your cork matches up on the left of the first layer make it on the right for the second layer.
Then staple the cork together and the paper to the cork.
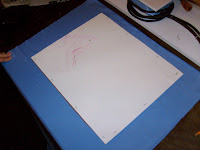
You aren't going to see this piece of posterboard later so we reused some her daughter's had colored.
Now time for the fabric. Iron is to make sure all the wrinkles are out because you can't iron it once it is put together. Place the right side (if it has one) of the fabric down. Place the cork side of your cork/posterboard creation down on the fabric. Then cut the excess fabric away. You will need about 2 inches or so of fabric all the way around.
Then fold the fabric over one side and staple it to the posterboard/cork. Then pull the fabric taught (not super tight though, you don't want to stretch your fabric). Staple the opposite side. Then do the same thing for the top, then the bottom. We folded the corners in before doing the top and bottom to make it look nicer.
Between each section you might want to make sure there are still no wrinkles on the front and make sure your design (if you have one) is still centered.
Then place this inside the frame. It might be a little tight because of the thickness the fabric adds but that's ok. Then measure the width of the outside of your frame and measure a piece of posterboard to fit. Staple that onto the frame.
Now that is is all stapled on, if any excess poster hangs off trim it with scissors or a knife.
Now the last step is to put a picture hanger on the back or staple a piece of twine to the back.
Tada! All done!! Now you can stick your earrings straight into the cork board (Shannon keeps her earring backs in a little box on her dresser). Or you can use thumbtacks (decorative pretty ones!) to hang your necklaces and bracelets.
For more help organizing your home & life check out Shannon's facebook page: Amazing Spaces


No comments:
Post a Comment